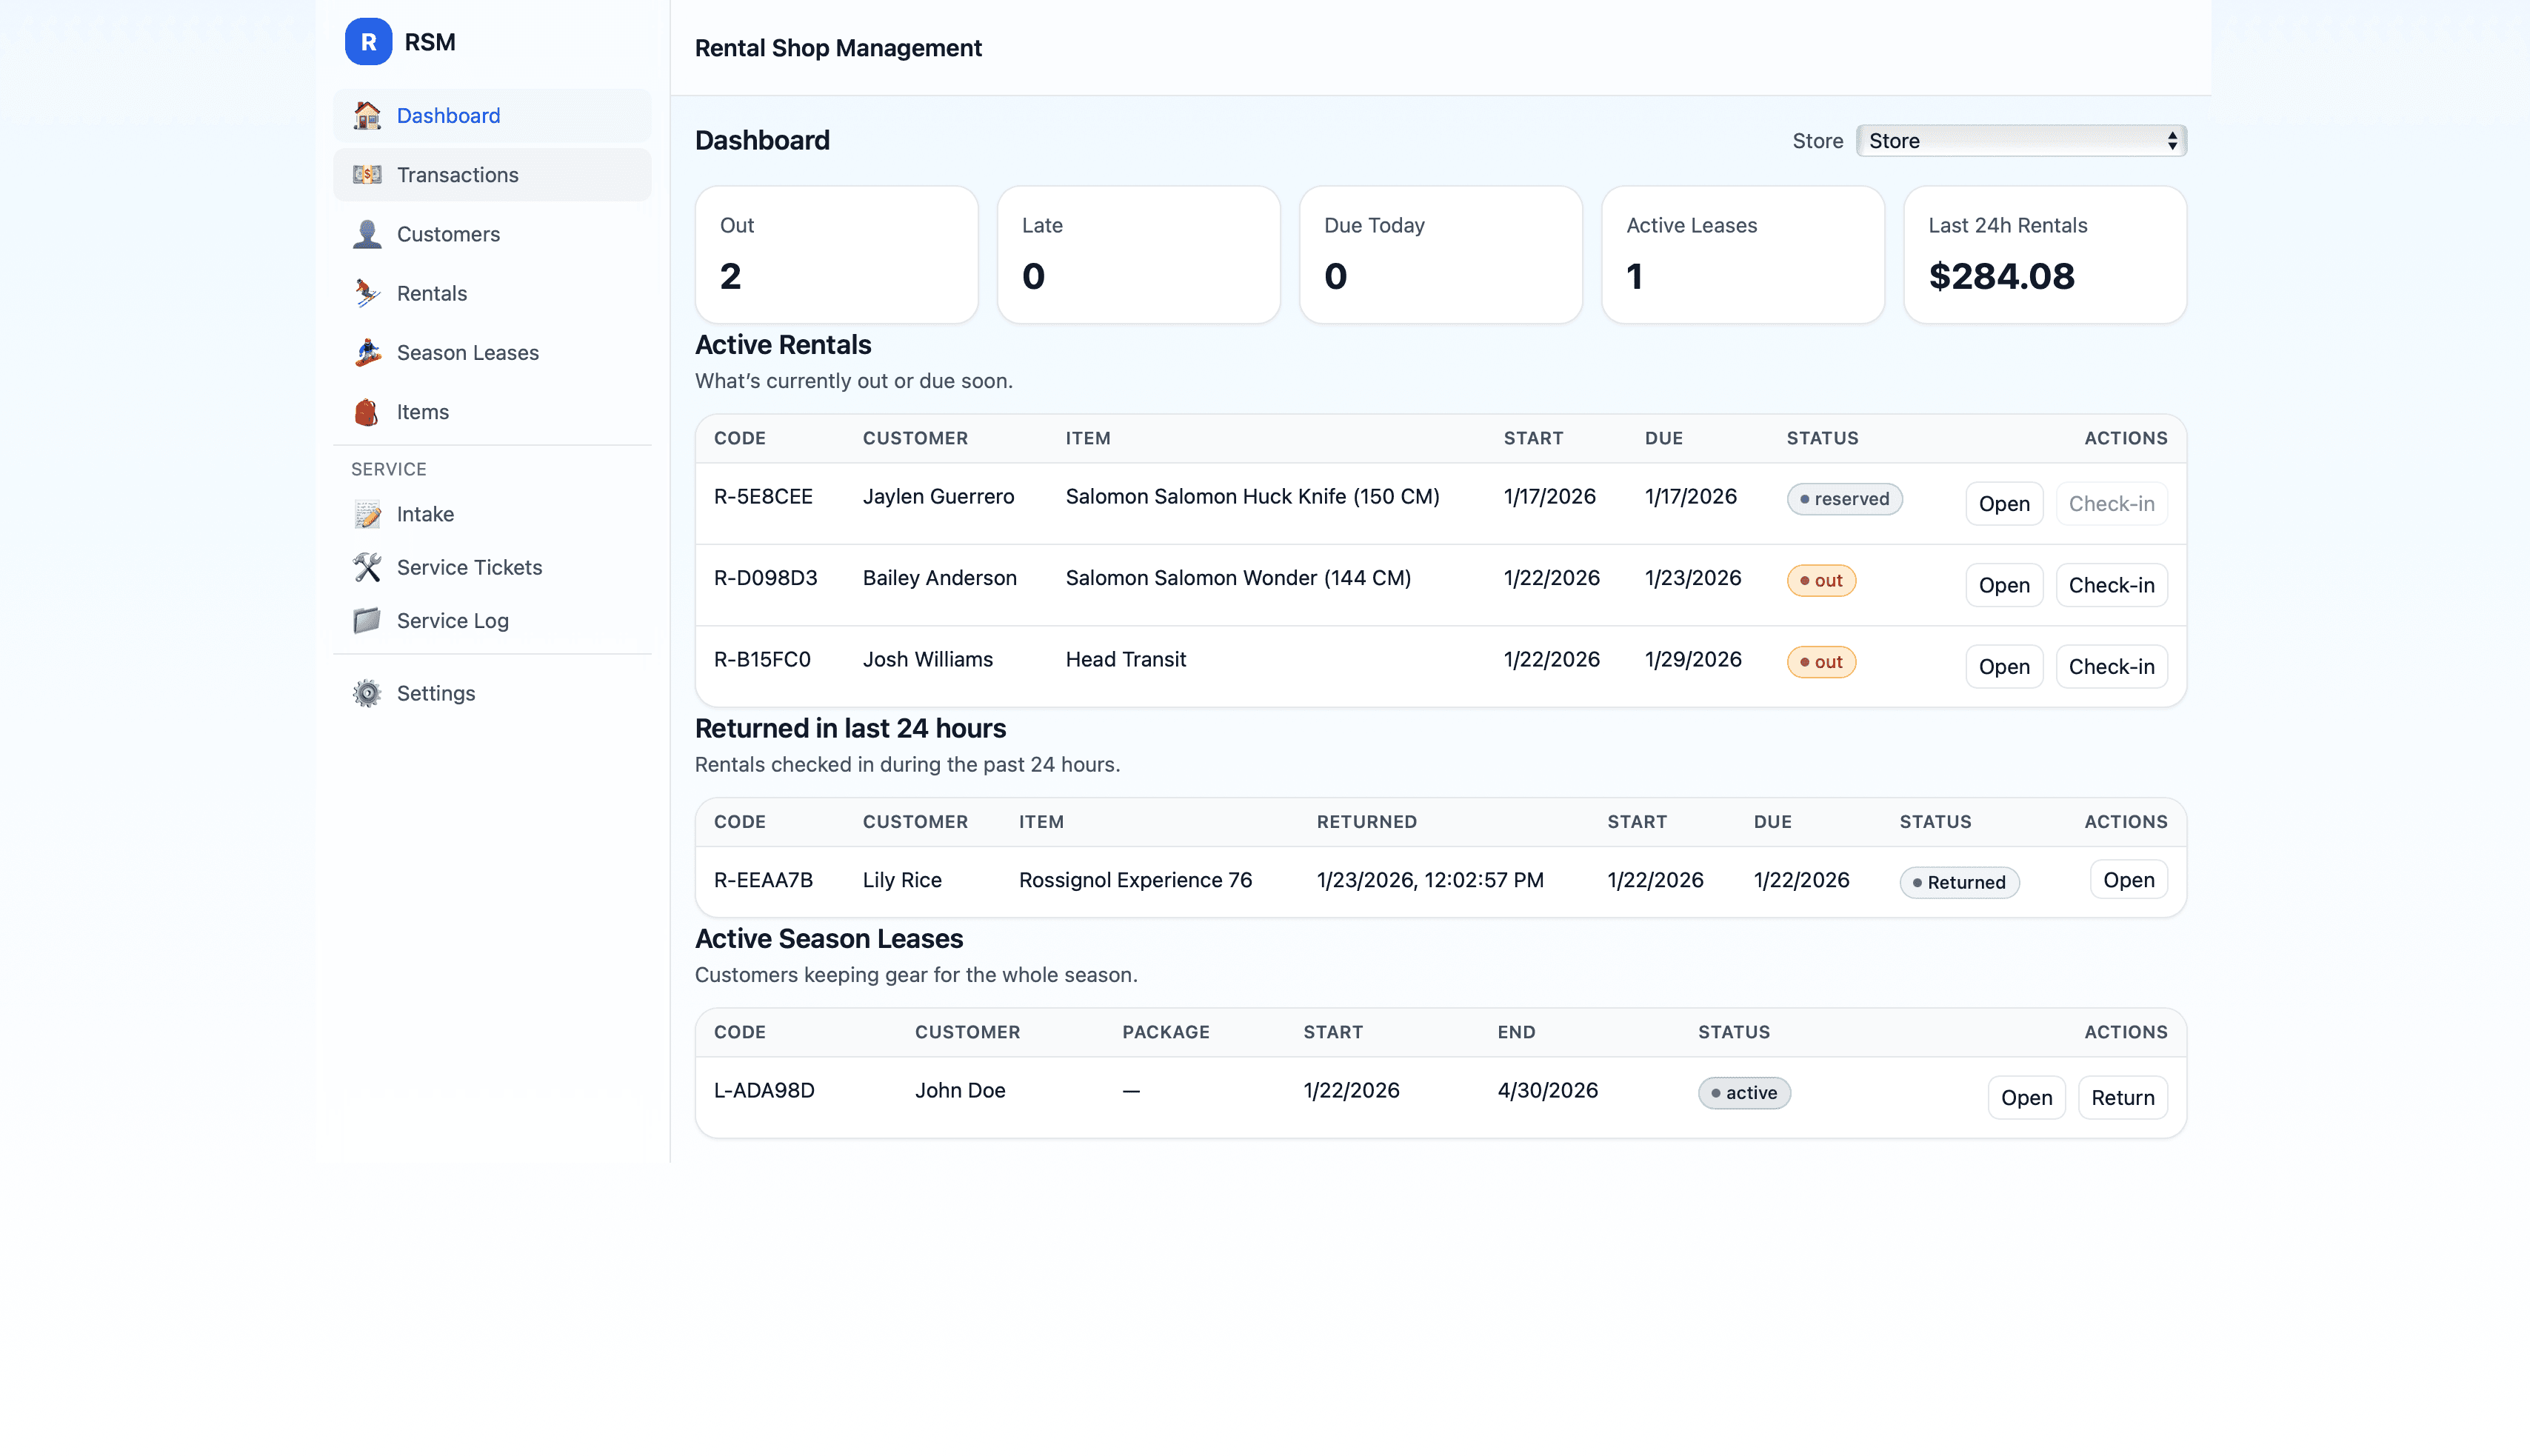
Rental Shop Management
VideoScreensLog In
Live Product Walkthrough

See How
RSM Works
In Real Shops

Watch the flow from dashboard to service completion, then review each screen with notes your team can use for onboarding and live demos.

Watch DemoJump to Screens
Full walkthrough via YouTube
Step 1

Dashboard Overview

The dashboard gives staff a quick snapshot of what is happening today: active work, priorities, and one-click navigation to critical flows.

  • Start of day visibility for your team
  • Jump directly to rentals, service, and payments
  • Fast context for shift handoffs
dashboard
Dashboard Overview
Step 2

Service Tickets

View every open ticket, filter by status, and jump directly to a ticket by scanning a tag or QR code.

  • Status-based queues for staff
  • Search and scan to find jobs quickly
  • Create intake from one place
service-tickets
Service Tickets
Step 3

Ticket Details

Inside a ticket you can review customer info, items, notes, parts, and progress. This is the screen your team works from throughout service.

  • Update status as jobs move through the shop
  • Keep technician notes in one shared timeline
  • Maintain traceability for each service order
ticket-details
Ticket Details
Step 4

Payments

Collect deposits or final balances directly from the ticket so payment history stays tied to service work.

  • Take payment at completion or intake
  • Link service and payment records automatically
payments
Payments
Step 5

Customer Profiles

Quickly access customer history, contact details, and previous service context so repeat visits move faster.

  • Lookup by name, phone, or email
  • Use history at intake to save time
customers
Customer Profiles
Demo environment. Screens reflect sample data.